C:\openvino_genai_windows_2025\runtime\bin\intel64\Release
C:\openvino_genai_windows_2025\runtime\3rdparty\tbb\bin
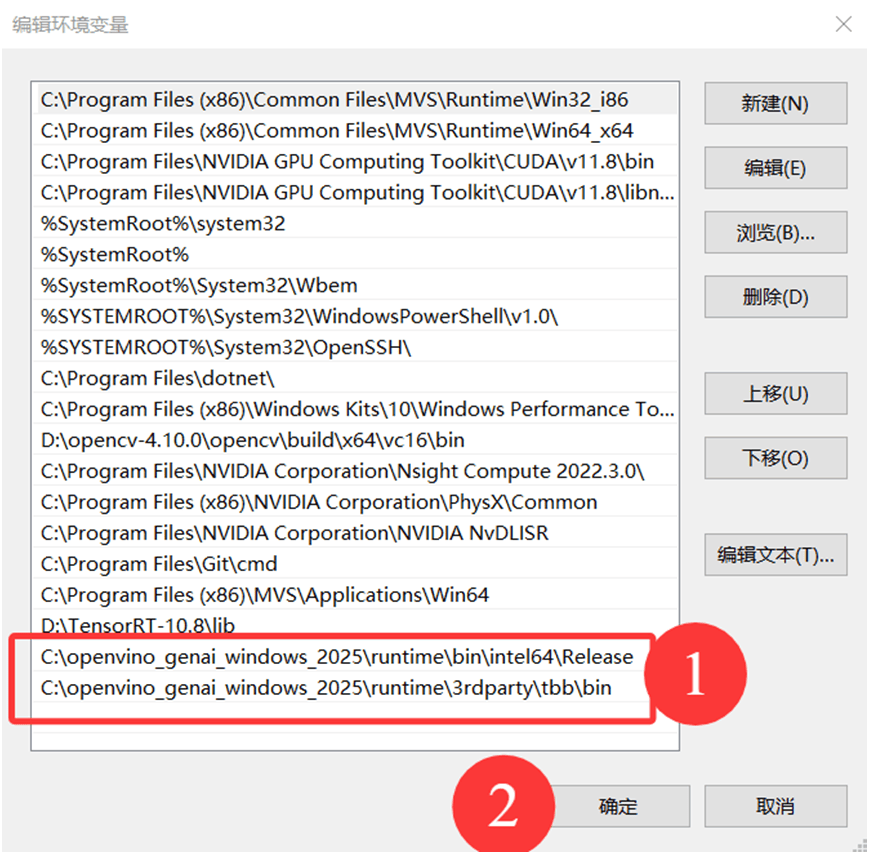
点击“确定”保存。
2. 创建 Visual Studio 项目
打开 Visual Studio 2022,选择“创建新项目”。选择“控制台应用-空项目”模板,点击“下一步”。输入项目名称和位置,点击“创建”。
![]()
3. 配置项目属性
在“解决方案资源管理器”中右键点击项目,选择“属性”。确保“配置”为“Release”,“平台”为“x64”。
配置包含目录
在“属性页”中,选择“VC++ 目录”。在“包含目录”中添加include 目录
C:\openvino_genai_windows_2025\runtime\include
配置库目录
在“库目录”中添加lib 目录
C:\openvino_genai_windows_2025\runtime\lib\intel64\Release
配置附加依赖项
在“链接器” > “输入” > “附加依赖项”中添加库文件
openvino.lib
openvino_genai.lib
openvino_onnx_frontend.lib
4. 常见问题
找不到 DLL:确保环境变量已经配置了,VS2022已经重启了。
YOLO11代码演示
基于OpenVINO2025 C++ 部署YOLO11姿态评估模型,运行演示效果如下:
![]()
我已经把YOLO11 + OpenVINO2025 C++的推理代码封装为一个类,客户端代码调用,只要三行代码即可实现,相关代码如下:
#include<openvino_yolo11_pose.h>
#include<iostream>
#include<fstream>
std::string label_map = "D:/python/yolov5-7.0/classes.txt";
intmain(intargc, char** argv){
std::shared_ptr<YOLO11PoseDetector> detector(newYOLO11PoseDetector);
detector-> initConfig( "D:/python/yolov5-7.0/yolo11n-pose.onnx", 0.4);
cv::VideoCapture capture("D:/images/video/dushuhu_01.mp4");
cv::Mat frame;
while( true) {
boolret = capture. read(frame);
if(frame. empty) {
break;
}
detector-> detect(frame);
cv:: imshow( "YOLO11姿态评估 + OpenVINO2025", frame);
charc = cv:: waitKey( 1);
if(c == 27) { // ESC 退出
break;
}
}
cv:: waitKey( 0);
cv:: destroyAllWindows;
return0;
}
![]()
OpenCV4系统化学习
深度学习系统化学习返回搜狐,查看更多